
AI Photo Enhancer

Quick Picks:

Single Edit uses one source image.

174 / 20000
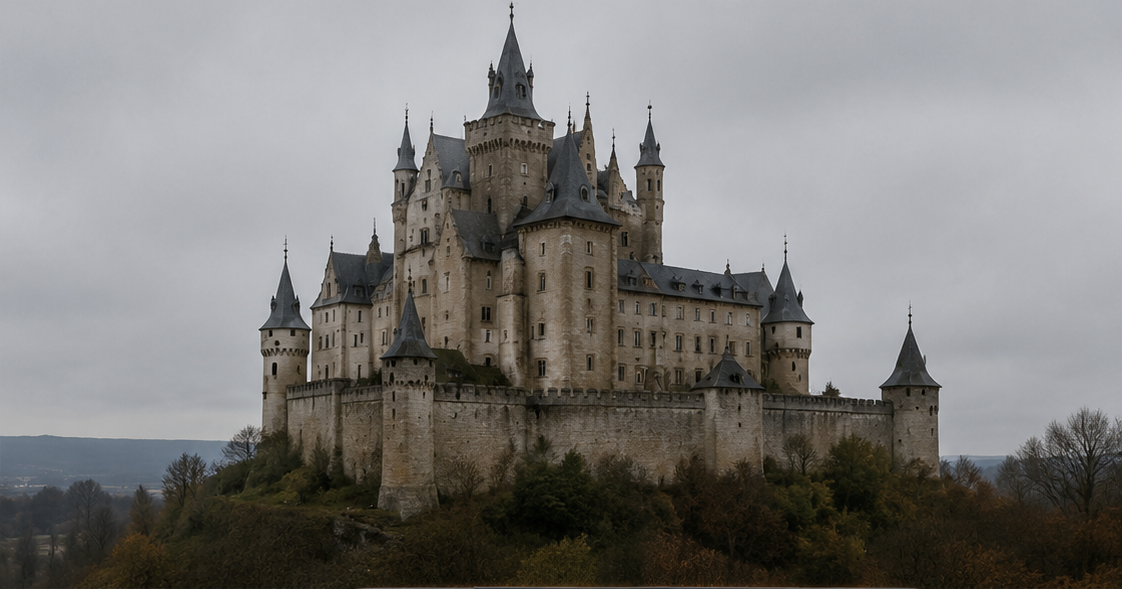
Source example for photo enhancement: a dim castle beneath an overcast sky; no enhanced result shown

Start with the quality issue you can see

Example source image

Source example for photo enhancement: a dim castle beneath an overcast sky; no enhanced result shown

An overcast scene with dim stonework and deep foreground shadows.

This is a source illustration, not an enhanced result. A focused brief would lift the building's exposure slightly while retaining the overcast sky, stone texture, windows, and rooflines. Compare those details with the original after an edit; replacing the sky or redesigning the building would be a different task.

Choose a quality improvement

Do not overpack the prompt. Point out what feels wrong in the photo, protect the details you care about, then compare the result before asking for another pass.

How to enhance photo quality online

Start with the best available source and judge the result against it.

01

Upload your source

Start with a JPG, PNG, or WEBP image you own or have permission to edit. The photo enhancer works best when the main subject is visible and the source is not extremely compressed.

02

Choose one improvement

Describe the main issue: dim exposure, an unwanted color cast, or slightly soft edges. Specify important object details and framing that should stay the same.

03

Compare and download

Check the full-size result for halos, changed markings, invented texture, and clipped highlights. Download a suitable version, or return to the original and retry with a more focused prompt. New generations use credits.

Improve a photo with a focused edit

Work on the main quality problem before changing the scene or adding a new style.

Quality first

Improve clarity while keeping the original image

Enhancement targets visible quality: exposure, white balance, contrast, and mild softness. A generative model can also change object details despite preservation instructions. Compare the result with your source, especially product markings, straight edges, and repeating patterns. More apparent sharpness does not prove recovered detail.

Try the editor
Online workflow

Choose the tool for your outcome

Use this page for light, color, and clarity. Use Image Upscaler when your main goal is a larger output, or Photo Restoration for scratches and damage in an old print. These tasks can overlap, but they need different instructions and different checks. None guarantees recovery of information absent from the source.

What to ask the photo enhancer to improve

The best enhancement prompts are specific about the quality issue and clear about what must stay unchanged.

Keep edges natural

Ask the photo enhancer to improve fine detail, edges, fabric texture, product materials, or background clarity without creating crunchy outlines or fake detail.

Balance light and color

Use the AI photo enhancer for low-light photos, dull colors, haze, or flat contrast. Mention natural lighting, realistic shadows, and original color mood when those details matter.

Protect the original subject

State what should stay the same, then verify it. Check product design, markings, object shape, and framing. Use a conventional editor when exact pixel preservation is required.

Use free credits with focus

Check your available balance and the selected model's cost before generating. Choose one useful adjustment per request and compare it with the source before spending credits on another version.

Photo enhancer notes

Know what to check when an edit looks clearer but may not be more accurate.

Strong edge contrast can create halos, while smoothing can erase texture. Try a prompt focused on mild enhancement and compare with the original at full size. Reject a result that looks cleaner by replacing real surface detail.
Single Edit processes one source photo into one result. Multi Fusion combines references into one composition and is not a batch enhancer. Use a separate request for each photo you want to enhance.
Output dimensions depend on the selected model and source. This page does not promise an exact enlargement factor. Choose Image Upscaler when a larger output is your main goal, then check the downloaded dimensions.
No. A tiny screenshot or heavily compressed file does not leave much real detail to work from. You may still get a cleaner result, but it should not be treated as guaranteed recovery.

Enhance your photo

Upload an image and start with the light, color, or clarity improvement it needs most.

Open photo enhancer

Photo enhancement edits worth testing

Start with an image you have permission to edit and a specific quality issue.

Dim object photos

Enhance photo quality for images that look soft, dark, flat, hazy, or slightly washed out. Ask the AI photo enhancer for natural clarity instead of a dramatic style change.

Product images

Use a photo enhancer online to improve product texture, edge clarity, exposure, and color balance while keeping the product shape, material, and background style stable.

Architecture and scenery

Try moderate contrast or color corrections in a flat-looking scene. Check that windows, rooflines, foliage, and horizon details have not been replaced or distorted.

Photo enhancer FAQ

Q

Can I enhance a photo online for free?

Available trial or daily credits can cover a request when your balance meets the selected model's cost. Check the balance and generation cost in the editor. Free usage is limited, and further edits require sufficient credits.

Q

What kind of photo is worth uploading?

A photo with some real detail left in it. Slight blur, uneven light, dull color, or soft product texture are all reasonable tests. Very small files, heavy compression, and extreme motion blur give the editor much less to work with.

Q

Will the enhancer change my photo's content?

It can, even when the prompt requests a conservative edit. Ask to preserve framing, background, colors, and important details, then compare with the source. Do not treat generated text, markings, or fine texture as verified recovery.

Q

Should I use enhancement or restoration?

Use enhancement when the photo mainly needs clearer quality, better light, sharper detail, or cleaner color. Use restoration when the image is torn, stained, scratched, badly faded, or visibly aged.

Q

Are there images I should not enhance?

Yes. Stick to images you own or have permission to edit. Do not alter sensitive documents, authorization markers, payment evidence, or content where changing the image would be misleading.